tinyshirt
Senior Member
"I am doll parts"
Posts: 249 
|
Post by tinyshirt on Aug 26, 2017 12:52:45 GMT -8
good news, they look great! Assembly a doll with springs is very difficult. Springs come in many different sizes and tensions. You have to experiment a great deal with different springs until you get the right combination. Also, if you are not careful (and even if you are careful) It is easy to chip your pieces when installing the springs. My dolls are heavy and the tension needed to properly assemble my dolls with springs is too great and the springs don't work so well in my dolls. I prefer strong elastic cord. However, if you are determined to use springs you should read about it first. There is a book you have probably heard of with some great info: www.amazon.com/Learning-Doll-Artist-Martha-Armstrong-Hand/dp/1893625044and also this web page offers a great diagram to help you get started cindymcclure.com/2011/02/how-to-put-a-ball-jointed-doll-bjd-together-by-cindy-mcclure/Even after reading and doing research you will need to put hours of time into experimenting with spring assembly on your doll. As for suede, you do not have to use leather, you can use a thin vinyl fabric. I think the best synthetic fabric is called ultrasuede and it looks the same on both sides. I would recommend something that does not ravel at the edges. I use a non toxic pvc glue to adhere the leather. I hope this helps! |
|
|
|
Post by ayamish on Aug 26, 2017 22:27:02 GMT -8
Thanks! I have another question, in the past, I tried to assembly a porcelain bjd with elastic cord and it didn't come out very well... After stringing the doll with the elastic cord I couldn't pose her(that's the reason I prefer to try springs), I wanted to ask if you know why did it happen and how I to prevent that next time? Thanks  |
|
|
|
Post by ayamish on Aug 27, 2017 6:27:59 GMT -8
I also wanted to ask if I can apply tiny eyelashes to my porcelain bjd? I bought some springs and I will try to assembly my doll today, if it won't go well I will use elastic instead... I really apriciate your help, Thanks a lot |
|
tinyshirt
Senior Member
"I am doll parts"
Posts: 249
|
Post by tinyshirt on Aug 27, 2017 13:17:50 GMT -8
Hi ayamish when you are designing your joints for your dolls you need to visualize how elastic or s hook will move through the joint to allow for flexible movement and maximum articulation. It is a small detail, but critical for your doll's movement. You can see the double thigh joints in my Cloud and how I make room for the elastic in the openings on the front of the joint. The backs of the knees, elbow joints, feet, hands, and armpit have opening that accommodate the elastic. If your openings are not wide enough or long enough you will encounter limited mobility 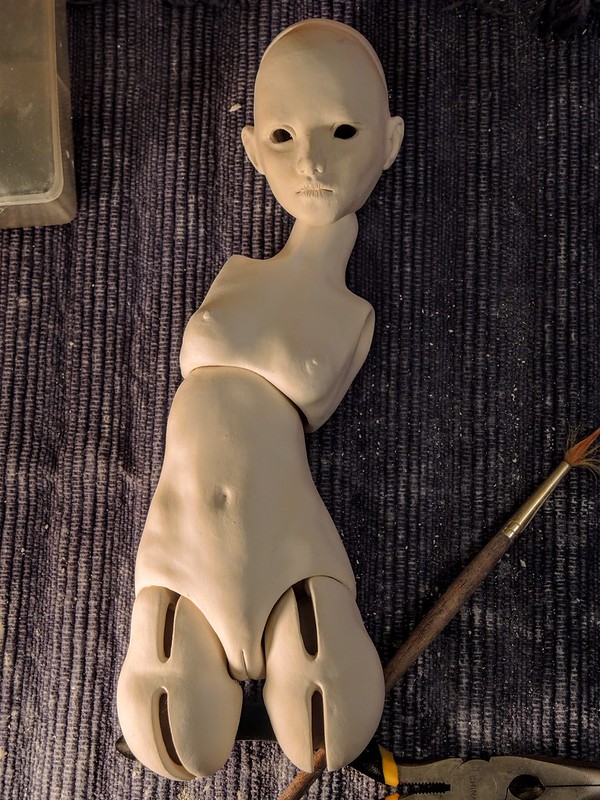 revised cloud revised cloud by Randi Channel, on Flickr |
|
tinyshirt
Senior Member
"I am doll parts"
Posts: 249
|
Post by tinyshirt on Aug 27, 2017 13:18:59 GMT -8
you can use epoxy to adhere the tiny eyelashes, they will be cute. Please post photos!
|
|
|
|
Post by ayamish on Aug 27, 2017 23:04:23 GMT -8
Hi, tinyshirt, thanks for your help and by the way, I really like the doll in the picture you sent I worked for hours on the assembly of my doll, she won't be able to do lot of poses but at least she is almost ready... I assembled her body and legs with springs but i will string her hands with elastic because they are too small for the springs (she came out so tiny...), her feet will be magnetic. She is the fastest doll i have ever made, I started her two month ago as a project for an exhibition in the arts high school I study at. Only one week left until she has to be ready so I hope I will make it on time. I am trying to figure out which way is the fastest to make a doll's stand, if you have any help with it I will be glad to hear, thank you very much, Romi Attachments:
|
|
tinyshirt
Senior Member
"I am doll parts"
Posts: 249
|
Post by tinyshirt on Aug 29, 2017 2:48:14 GMT -8
My stands take a little while to make because they have a porcelain base. I would suggest purchasing an inexpensive doll stand, taking the holder out and attaching a copper tube to a piece of wood, once the copper tube is attached to the wood you can insert the holder. You can paint the wood or cover it with fabric.
|
|
|
|
Post by ayamish on Aug 29, 2017 11:39:19 GMT -8
Thanks!
|
|
|
|
Post by ayamish on Sept 1, 2017 7:04:13 GMT -8
Hi, just wanted to share a picture from my process... (i already assembled her hands but i don't have a good picture of her with hands). Romi Attachments:
|
|
tinyshirt
Senior Member
"I am doll parts"
Posts: 249
|
Post by tinyshirt on Sept 2, 2017 5:32:31 GMT -8
I am so glad to her all put together! She looks great, I hope you were able to meet your deadline at school!
|
|
|
|
Post by ayamish on Mar 28, 2018 2:34:57 GMT -8
Hi,
I have started to work of a new bjd phototype and i have some questions.
I want to create my doll with glass eyes but I don't know how to sculpt and mold the doll's head in order to make it suitble for the glass eyes...
I also don't know how to create and attach the glass eyes to the porcelain doll head since i never did it before; I wanted to ask if any of you know anything about it?
Another question I have, is about resin bjd, I really want to cast my doll with resin before transforming her into porcelain but I read that resin is very toxic. I wanted to ask if resin is really that dangerous and if it does, if there is some resin brand or alternative metrial which won't cause any health harm?
My last question is about primer, I wanted to ask if sparying the doll parts with primer will conceal the tiny details (for example- the lip line, the nostrills, the fingernails...)?
Thanks,
Romi
|
|
|
|
Post by tanoy13 on Mar 28, 2018 20:44:40 GMT -8
I’m only a collector, not an artist, but I wish you well in your creative endeavor.
|
|
tinyshirt
Senior Member
"I am doll parts"
Posts: 249
|
Post by tinyshirt on Mar 29, 2018 15:13:27 GMT -8
In order to prepare your dolls head for glass eyes you will need an eye beveler. This tool is a tiny sanding sphere that creates a socket behind the eye. If you are using porcelain you will need to order the eye beveler in a larger size than the eye you intend to place in the doll's head because the porcelain shrinks in the kiln. You can attach the eyes with epoxy resin or silicon ear plugs. I use silicon ear plugs, but I am not sure if you can access these where you are. Resin is always toxic. You can only cast your own resin doll if you have a centrifugal machine that rapidly spins the resin in the mold so that it creates a hollow shell. I don't know about resin alternatives, I know that artists who want to cast their dolls in resin usually source them out to a company that specializes in this type of production (harucasting) I don't know anything about primers because I work in clay, I would assume that the product would interfere with the overall surface because you would have to apply it in layers which would build up and obscure fine detail.
|
|
|
|
Post by ayamish on Mar 30, 2018 3:28:13 GMT -8
tinyshirt, thank you so much for your help! I can buy silicone ear plugs, but I didn’t understand how can I attach the eyes with it, can you explain me how to do that? And another question- the head I sculpted is not hollow(I’m working with super sculpey and I haven’t baked it yet, but I’m afraid that if I will make it hollow it’s shape will change...), can I mold the head the way it is and after casting it in porcelain to cut the eye holes (without using the eye beveler)? Thanks, Romi |
|
tinyshirt
Senior Member
"I am doll parts"
Posts: 249
|
Post by tinyshirt on Apr 1, 2018 6:35:52 GMT -8
Hello ayamish your master or original sculpture does not need to be hollow. When you make the mold and pour the slip you will leave the slip in the mold for about 5 min, pour out the extra slip and you will be left with a hollow casting. You can cut the eyes out with a little blade. If you don't use a beveler, the eyes will not get as close to the inside of the eye socket and they will not look very natural. When using the silicon ear plug, I pinch of a small amount and gently push the eye into it, then I push it into the eye socket. Once it's in the eye socket, you will need to adjust it a little with your finger, a pin tool or a pair of tweezers. 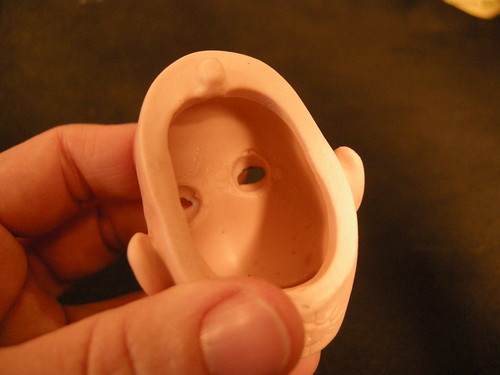 DSCN4715 DSCN4715 by Tiny Shirt, on Flickr 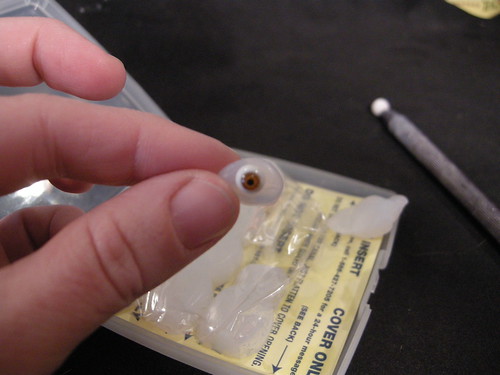 DSCN4717 DSCN4717 by Tiny Shirt, on Flickr 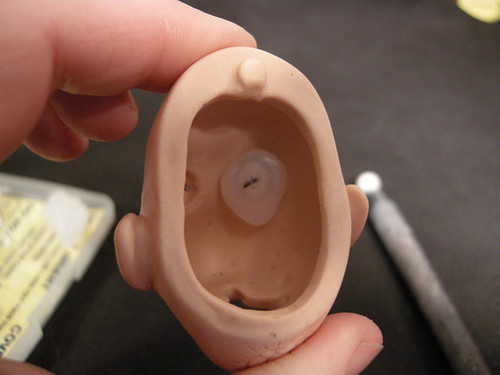 DSCN4718 DSCN4718 by Tiny Shirt, on Flickr 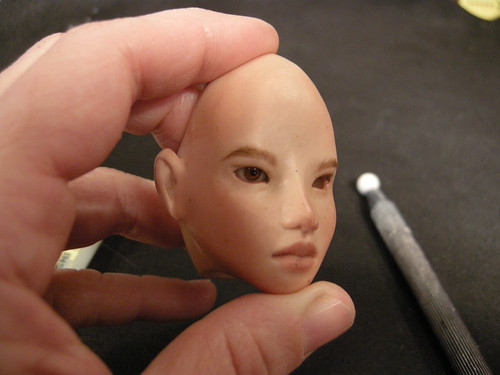 DSCN4719 DSCN4719 by Tiny Shirt, on Flickr |
|


